The astonishments of this no-knead bread without Dutch oven recipe are never-ending. Enjoy this carefully made recipe.
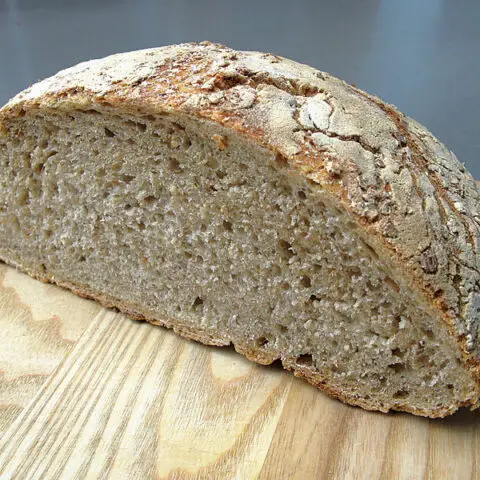
Don’t be surprised that you can bake no-knead bread without a Dutch ovenhttps://bbqgrillandsmoke.com/tandoori-chicken-without-oven-recipe, and it will still result in a beautiful crust on the exterior and a tender and airy interior.

All you need for this is just 10 minutes to prepare and less than 4 hours to rise this bread, and it will come out perfect every single time.
When it comes to making homemade bread, no-knead bread has become a recent trend.
Jim Lahey was the one who made this artisan bread method popular, and he’s the owner of the Sullivan Street Bakery in New York.
It is famous in a wild manner with more or less everybody, ranging from novices to seasoned bakers, and on reasonable grounds.
What’s the Deal With No Knead Bread?
In 2012, the no-knead bread method was first reintroduced by a man who goes by the name Jim Lahey.
However, the actual recipe and idea are pretty ancient. The ratio of ingredients has remained more or less the same through the several versions made since.
But the difference can be found in the rising process. Firstly, the entire point of Jim’s recipe is that the raising takes 12 to 18 hours after mixing.
There has been a second wave of shorter, faster rises. Even though the development of the flavor is helped by the longer rising time, I’d still opt for a faster option.
That is not to say that flavor is not important. But just watch and learn how it’s done.
No-Knead Bread without Dutch Oven
This simple, no-knead bread without a Dutch oven tastes mouth-watering and will make your house smell incredible. It is worth your time.
- Course: Main Course, Side Dish, Soup, Appetizer
- Cuisine: American
- Prep Time: 10 minutes
- Cook Time: 30 minutes
- Rising Time: 3 hours, 10 minutes
- Total Time: 3 hours and 50 minutes
- Servings: 40 slices (2 loaves)
Ingredients
- 6 ½ cups of all-purpose or bread flour
- 3 cups of warm water
- 2 teaspoons of salt
- 2 teaspoons of sugar
- 1 ½ tablespoons of active dry yeast (you can also use instant yeast or rapid rise; 2 packages of yeast)
Laid-Out Instructions
- First, get a large bowl and combine the yeast with warm water and sugar in it.
- However, ensure that the water is hotter than 110 degrees Fahrenheit, or else you will kill the yeast.
- After that, allow the mixture to rest for 5 minutes. The mixture should get bubbly, and foam will appear.
- Now, that is a sign that the yeast is working. Afterward, add the flour to the yeast and mix until they are well blended.
- That being done, allow it to rest for 15 minutes, then mix in the salt. When you wait to add the salt, it lets the yeast work more effectively in those first 15 minutes.
- Then, cover with a light towel immediately after the salt is well combined and allow it to rise for 2 hours and 30 minutes at room temp.
- Divide the dough in half. Proceed to shape the dough into two rounded loaves, then fold the dough under itself to make a smooth top.
- You can just put one dough loaf in a tightly sealed container or Ziploc bag and put it in the refrigerator to bake later if you don’t plan to bake both loaves at once.
- Get a parchment-lined baking sheet and place the loaf on it. Allow the dough to rise again for another 40 minutes.
- However, allow the dough to rise for 1 hour and 30 minutes if you are baking the second refrigerated half that you removed from the refrigerator.
- After that, place a rimmed baking sheet on the bottom rack of your oven and preheat the oven to 450 degrees F.
- Immediately after the dough is done with its second rise, spray it with flour and cut the top in many places, then place it in the oven.
- Get 1 cup of water and pour it onto the bottom baking sheet. This will cause steam and give the bread a nice crust.
- After that, bake the bread for 25 to 30 minutes. Then, when it is done, it should have a hollow sound and an internal temperature of 190 degrees Fahrenheit.
- Furthermore, before slicing into it, make sure that you allow the bread to rest completely, or else it can seem undercooked. After that, slice, serve, and enjoy.
How To Store Your Artisan Bread For Long
To store the bread, this delicious baked bread can remain fresh for two to three days on the shelf.
Freezing The Bread
Just wrap it in some paper and then place it in a tightly sealed freezer bag. This is if you want to freeze the bread.
Also, allow the loaves to cool completely. The bread will be able to last for up to 2 months in the freezer.
And, once you need it, just allow it to defrost overnight and then warm it up in the oven.
How To Serve No-Knead Bread
You can pair this no-knead bread dough with savory babka bread.
Or, make a buffalo chickpea sandwich with this artisan bread and enjoy.
You also have the option of serving this delectable bread with soup or lentil curry.
Recipe FAQs
Can I freeze This Bread?
Of course. And the way to do this has already been given above. Well, just slice the bread into slices.
Then, place it into a reusable silicone storage bag and put it in the freezer.
And, when it is time to consume it, just defrost the slices in the microwave for 15 to 30 minutes.
Can I Use Bread Flour For This No-Knead Dough?
You can use bread flour. In my opinion, I will strongly suggest that you go with all-purpose flour, as the texture it gives the dough is perfect.
Using bread flour will surely yield softer, chewier bread with a tough crust.
Final Thoughts on No-Knead Bread without a Dutch Oven
You might be wondering why you have to add water to a baking dish in the oven.
As previously stated, the water will create steam and a delectable crust.
This recipe for no-knead bread without a Dutch oven is easy, nutritious, and mouth-watering.
You can always enjoy this bread with cheese and butter or dip it in soup.
This bread is extremely good and simple to make, and you will crave it every single time.
And you can use the dough to make two large loaves or many rolls.
This healthy recipe is also ideal for making a strong bread bowl for any dips or soups—just anything you might want to serve out of it.
Now, this concludes this guide on no-knead bread without a Dutch oven, as you now have the best recipe to make it.
No-Knead Bread Without Dutch Oven Recipe
The astonishments of this no-knead bread without Dutch oven recipe are never-ending. Enjoy this carefully made recipe.
Ingredients
- 6 ½ cups of all-purpose or bread flour
- 3 cups of warm water
- 2 teaspoons of salt
- 2 teaspoons of sugar
- 1 ½ tablespoons of active dry yeast (you can also use instant yeast or rapid rise; 2 packages of yeast)
Instructions
- First, get a large bowl and combine the yeast with warm water and sugar in it.
- However, ensure that the water is hotter than 110 degrees Fahrenheit, or else you will kill the yeast.
- After that, allow the mixture to rest for 5 minutes. The mixture should get bubbly, and foam will appear.
- Now, that is a sign that the yeast is working. Afterward, add the flour to the yeast and mix until they are well blended.
- That being done, allow it to rest for 15 minutes, then mix in the salt. When you wait to add the salt, it lets the yeast work more effectively in those first 15 minutes.
- Then, cover with a light towel immediately after the salt is well combined and allow it to rise for 2 hours and 30 minutes at room temp.
- Divide the dough in half. Proceed to shape the dough into two rounded loaves, then fold the dough under itself to make a smooth top.
- You can just put one dough loaf in a tightly sealed container or Ziploc bag and put it in the refrigerator to bake later if you don’t plan to bake both loaves at once.
- Get a parchment-lined baking sheet and place the loaf on it. Allow the dough to rise again for another 40 minutes.
- However, allow the dough to rise for 1 hour and 30 minutes if you are baking the second refrigerated half that you removed from the refrigerator.
- After that, place a rimmed baking sheet on the bottom rack of your oven and preheat the oven to 450 degrees F.
- Immediately after the dough is done with its second rise, spray it with flour and cut the top in many places, then place it in the oven.
- Get 1 cup of water and pour it onto the bottom baking sheet. This will cause steam and give the bread a nice crust.
- After that, bake the bread for 25 to 30 minutes. Then, when it is done, it should have a hollow sound and an internal temperature of 190 degrees Fahrenheit.
- Furthermore, before slicing into it, make sure that you allow the bread to rest completely, or else it can seem undercooked. After that, slice, serve, and enjoy.